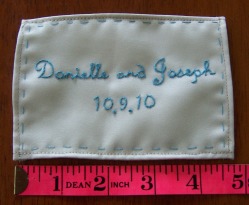
Wedding Dress Label - My Something Blue
This is technically not my DIY but my mom made it for me and I designed it so it made the cut for this page.
We got a square from my wedding dress to use for the fabric and then my mom hand stitched the text. I am planning on having my seamstress sew it into the inside of my dress for my something blue.
We got a square from my wedding dress to use for the fabric and then my mom hand stitched the text. I am planning on having my seamstress sew it into the inside of my dress for my something blue.
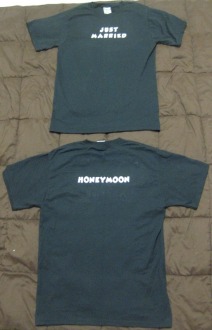
Honeymoon T-shirts!
Joe and I wanted matching t-shirts for the HM...yep we are that couple :)...not as bad as having a set for each day but we decided on making two pairs total.
The first pair are black t-shirts that have iron on letters on them. The front says "Just Married" and the back says "Honeymoon". I bought both the letters and the t-shirts at Michaels. I even think the letters have a Disney theme to them which is perfect for our Disney HM!
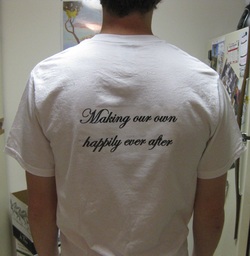
The second pair is white and I made them with iron on transfers I bought at Joann that you can print out from your computer. I found some Disney clip art online and then just put it all into a word doc, printed it out, and ironed it on. The front has a mickey and miney and says "Newlyweds" and the back says "Making our own happily ever after." If you look closely you can tell they are not perfect - I messed up the ironing a bit - but they are fine for t-shirts we will likely wear once :).
For those of you who decided to make something like this, leave the paper on the transfer while you iron on the transfer to the other side of the t-shirt (if you have both a front and back design) - that way you dont ruin what you did on the other side and can just peal off the paper after you are totally done ironing. Hope that makes sense!
Here are pics of both pairs!
The first pair are black t-shirts that have iron on letters on them. The front says "Just Married" and the back says "Honeymoon". I bought both the letters and the t-shirts at Michaels. I even think the letters have a Disney theme to them which is perfect for our Disney HM!
The second pair is white and I made them with iron on transfers I bought at Joann that you can print out from your computer. I found some Disney clip art online and then just put it all into a word doc, printed it out, and ironed it on. The front has a mickey and miney and says "Newlyweds" and the back says "Making our own happily ever after." If you look closely you can tell they are not perfect - I messed up the ironing a bit - but they are fine for t-shirts we will likely wear once :).
For those of you who decided to make something like this, leave the paper on the transfer while you iron on the transfer to the other side of the t-shirt (if you have both a front and back design) - that way you dont ruin what you did on the other side and can just peal off the paper after you are totally done ironing. Hope that makes sense!
Here are pics of both pairs!
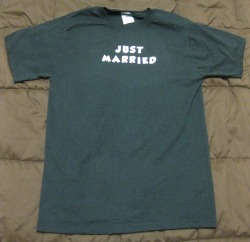
Front
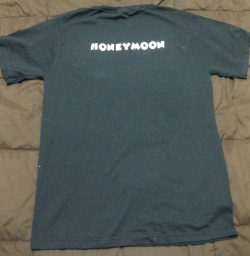
Back

Popcon Salt Shakers
I have officially gone overboard on my DIY projects :) but I really wanted to do these so I went for it anyway.
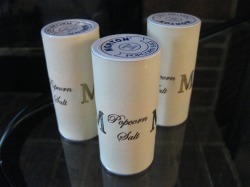
I wanted to make sure we had popcorn salt out for the popcorn late night snack but didnt feel the look of the blue Morton Popcorn Salt shakers really fit in with the wedding, so I changed them!
I used my 1.5 inch Xyron sticker maker machine to make three 1.5x5.5 inch strips. I printed the words "popcorn salt" out first on what would be the middle strip and then embossed two Ms on the sides. Then I just put on the top and bottom strip stickers first and put on the middle one last so that now the popcorn salt will even match the rest of the wedding :).
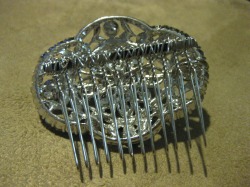
DIY Hair comb
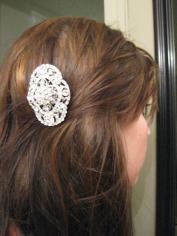
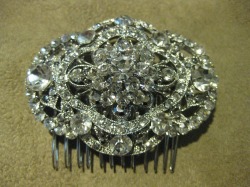
I bought a brooch off ebay and just wired it to a comb.
I used 24 gauge wire and bought the comb at joann's.
I think I am planning on wearinig it durring the reception after my veil comes off.
I used 24 gauge wire and bought the comb at joann's.
I think I am planning on wearinig it durring the reception after my veil comes off.
DIY Veil
I knew I wanted a really long single tier veil but the ones I was finding in the color, length, and style I wanted were over $100...and I just wasnt ready to pay that for something I knew I wanted but wasnt going to wear for more than a couple hours....so off to another DIY project!
This one was pretty simple. I bought 4 yards of ivory tulle and tea dyed it to make it a darker ivory. Then came the hard part....the tulle was pretty wrinkled after being dyed so I tried steaming it and ironing it. It was a good thing I bought more yards than I needed because I ended up putting a whole in the tulle at one end from the iron being too hot. Well I think I got it better but I was never able to get all the wrinkles out...but I really dont care - it is at a good point for me so we went with it.
From that point we (my mom and I) gathered the top of the tulle, sewed it on a comb, and rounded the ends (after cutting off the burnt end) and I had a veil!
Cost break out:
4 yds of tulle = 2.60
Hair comb = 0.80
TOTAL = 3.40
Here is how it turned out!
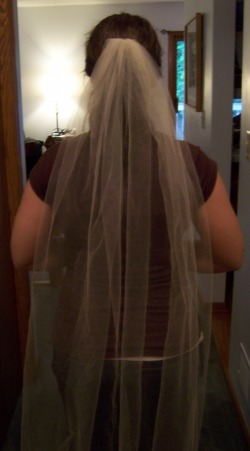
Close up shot
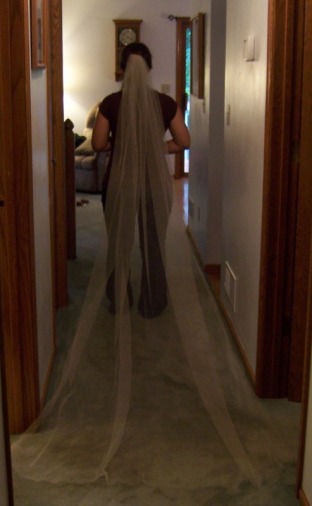
The entire thing
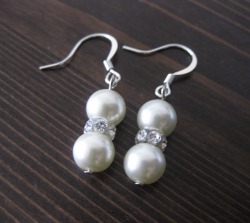
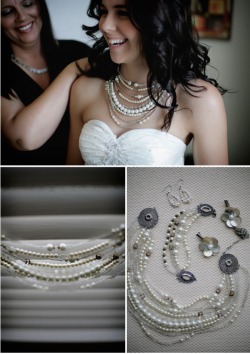
RD or Shower Dress DIY Jewelry
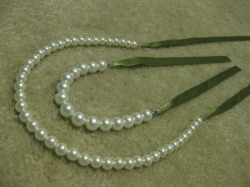
I wanted some white pearls to match the RD/Shower dress I got (PIB under Bride Attire) so I made a necklace and bracelet for it! These were super easy to make and I went with the ribbon tie style to add a little color.
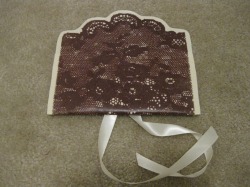
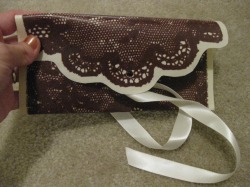
Martha Stewart Clutches
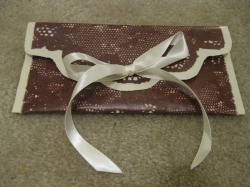
A girl from my local board did these and I decided they would be the perfect way to package up the bracelets I made for each BM (see below for bracelets).
I followed these directions http://www.marthastewartweddings.com/article/lace-clutch-clip-art?backto=true&backtourl=/photogallery/lace-projects#slide_3 pretty closely but I didnt like the colors, so I changed it up and made them brown instead and I love how they turned out!
I followed these directions http://www.marthastewartweddings.com/article/lace-clutch-clip-art?backto=true&backtourl=/photogallery/lace-projects#slide_3 pretty closely but I didnt like the colors, so I changed it up and made them brown instead and I love how they turned out!


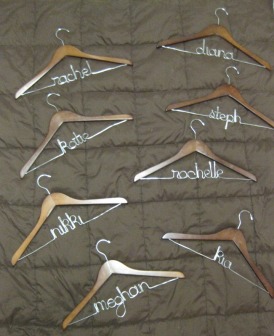
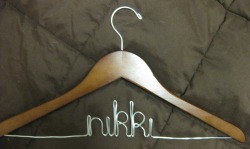
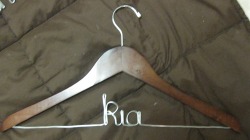
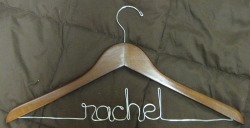
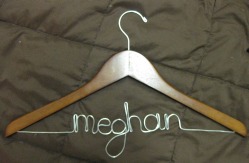
DIY Custom Hanger - part 2
You can see what I had originally made below but after reading Michelle's idea on my club board I decided to add wood to make them stronger...oh and we had a MSP knottie DIY GTG that I thought would be perfect for this project so I got them all done in one fell swoop!
I got the hangers in packs of 5 at target. I went with the cherry wood color.
I bought the wire from Michaels - 12 gauge. I then used mainly my hands to twist the wire and using a needle noise pliers to tighten some spots - for ex. the top of a "l" or "k."
I took an electric drill and drilled holes 1 inch up on either side of the hanger with a 5/64 bit. If you drill in at an angle they stay in really well....none of those pictured are glued in and they are all hanging in my closet right now just fine...although I will glue them cuz at this point you can move it around if you push the wire.
Here are pics...

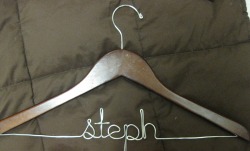
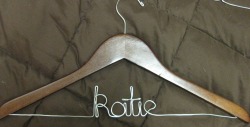

DIY Custom Wire Hanger - part 1
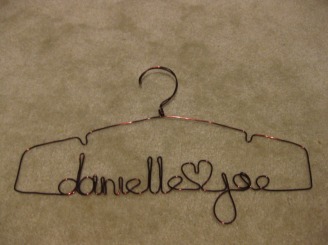
This idea was posted on my club board and I thought it was super cute but didnt want to spend the $30 to order one from Etsy so I decided to try my hand at making my own....and I think it turned out great!
Total Cost = $1.60
Yep way less than $30 to buy one. I got the wire from Michaels and choose to go with a colored wire. I had a 50% off coupon but it would have only been about $3 if I hadent.
I looked at the pictures on Etsy to determine how to make the letters and just winged it from there. It took my about 45 min to make. I just used my hands to bend the wire and did that almost the entire way. Where i wanted it tighter - like at the top of the "d" or "l" i just squeezed it with a needle nose pliers. I also twisted the wire at the top by the hook with the pliers. It really was not that hard if you look at the pics of the letters while doing it - I think the hard part is knowing how to create a letter and I just used the pics on Etsy for that.
Let me know if you have questions and I would love to help you if you decide to make one!
Here are the websites I used when gathering info/ideas...since I found looking at pictures of the letters the most helpful I would recommend just looking at the etsy site helpful but the others might get you started.
http://www.projectwedding.com/wedding-ideas/diy-instructions-for-wire-hangers
http://www.instructables.com/id/Personalized-wire-hanger-for-baby-clothes
http://www.projectwedding.com/post/list/diy-custom-wire-hangers
http://www.etsy.com/view_listing.php?listing_id=26651786
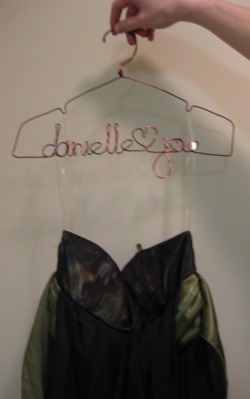
Here is the hanger with a dress on it - not my wedding dress but gave me an idea of how it will hold up - I think it will work for my wedding dress but I def wont be able to store it on it (which you shouldnt for the Etsy ones either)
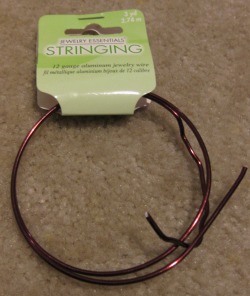
Here is the wire I bought - you can see I still have a little left but it pretty much went in to the hanger perfectly. It is 12 gauge wire and I chose the bronze color but they have a ton more colors.
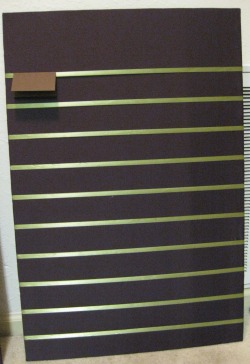
Escort Card Boards

All 4 - Done!
There is no space for an escort card table so why not a board! We have two easels that we bought from Joann with coupons for under $7 each and then bought 4 foam presentation boards ($1 each at the $ store) that I am covering in fabric and ribbons. Fabric was $10, pins were 1.80, and the ribbon was about $2 so grand total for this project will be about $32.
Here are the steps on how I am putting them together:
-Spray one side of the presentation board with spray glue
-Lay the fabric over the board and smooth it out letting the spray glue hold it in place (this takes a while to get right - luckily spray glue doesn’t dry super fast so you can pull it up and smooth it back down as you go to make sure it is totally smooth)
-Then I took pins (just straight sewing pins) and pushed them in the edges to hold down the fabric on the edges
-After that I just took packaging tape and taped down the fabric on the back of the board - and its covered!
-To add the ribbon I draped it across where I wanted it and again put a pin on each edge to hold the ribbon in place and a small piece of packaging tape at the back to hold the end of the ribbon down
Two boards will fit on each easel.
We will add a sign at the top of the boards which is why we left space at them top.
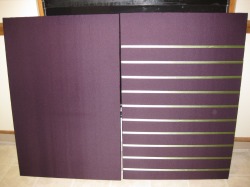
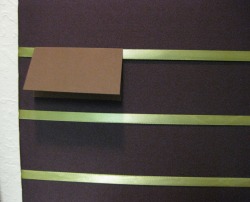
And sorry the color is so off - that is what you get for taking pics at different times of day. But the boards are covered in eggplant satin and the ribbon is an olive satin.
Here are the steps on how I am putting them together:
-Spray one side of the presentation board with spray glue
-Lay the fabric over the board and smooth it out letting the spray glue hold it in place (this takes a while to get right - luckily spray glue doesn’t dry super fast so you can pull it up and smooth it back down as you go to make sure it is totally smooth)
-Then I took pins (just straight sewing pins) and pushed them in the edges to hold down the fabric on the edges
-After that I just took packaging tape and taped down the fabric on the back of the board - and its covered!
-To add the ribbon I draped it across where I wanted it and again put a pin on each edge to hold the ribbon in place and a small piece of packaging tape at the back to hold the end of the ribbon down
Two boards will fit on each easel.
We will add a sign at the top of the boards which is why we left space at them top.
And sorry the color is so off - that is what you get for taking pics at different times of day. But the boards are covered in eggplant satin and the ribbon is an olive satin.
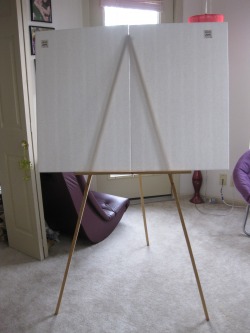
This is how the two boards will fit on each easel
In the process...
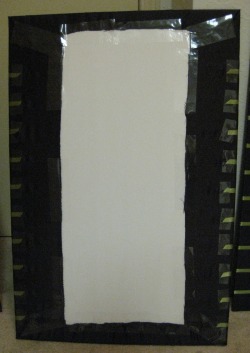
The Back

You can see the straight pins on the edges (and my dog in the background :)
One finished board with sample escort card
Close up of how card sits
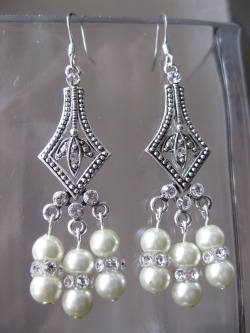
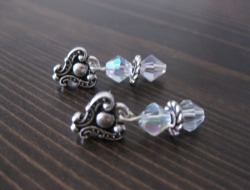
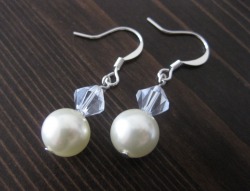
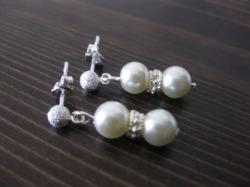
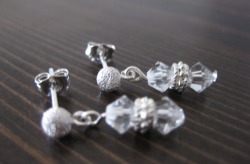
More Earrings...
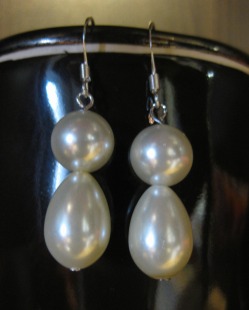
I still cant decide which earrings I want to wear on my wedding day so I just keep making more pairs :)...I think I need to stop soon or I will have WAY to many...actually I might already be at that point. Let me know if you are interested in a pair because I definitely wont be wearing them all so I think I want to sell the rest. You can page me either on the Minneapolis/Saint Paul board or the Oct 2010 board if interested (knot name drdifabio).
I think these are my the top 4 options right now...maybe I just need to try them all on with my dress...
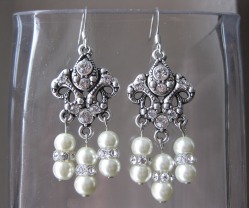
Here are the other ones I have made so far that I like but am just not sure they are what I am looking for for my wedding day...


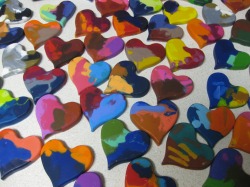
DIY Crayons
We were in the process of creating an activity book for the kids coming to our wedding when I saw this project posted on the DIY board. These were supper fun to make, really easy, and not expensive. I think the kids will really like them too! I found directions for them here: http://madincrafts.blogspot.com/2009/11/cheap-kids-stocking-stuffer-or-gift.html
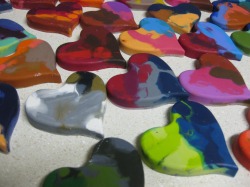
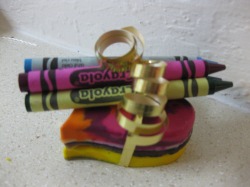
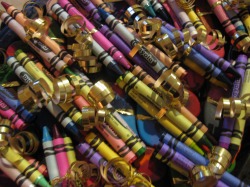
I then tied a pack of three hearts together with 4 individual crayons so each kid would have multiple colors.
I then tied a pack of three hearts together with 4 individual crayons so each kid would have multiple colors.
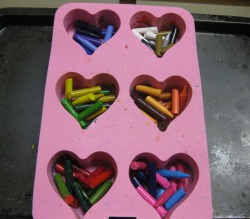
Ready for the oven. I got the trays in the $ section at target - it helped to have silicone trays to pop them out easy. Each 'cup' got four crayons. I used crayola as the ones from the $ store did not work as well and were smaller so you needed 5 per cup.
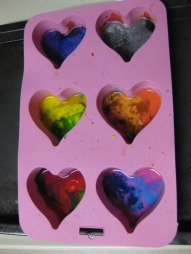
Just came out and ready to cool
Earrings
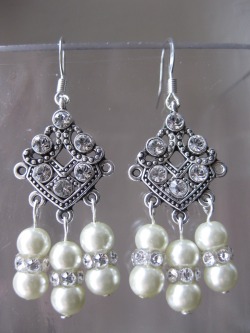
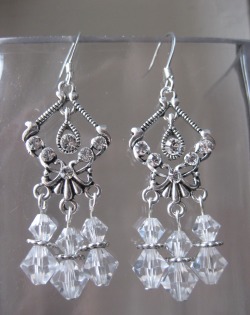
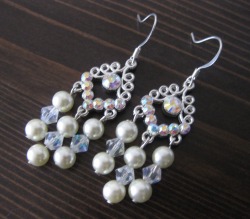
I was not able to find the earrings I was looking for for under $80 so I decided to make them myself....unfortunately I still cant decide which ones I like or if I have it quite right...but here is what I have so far.
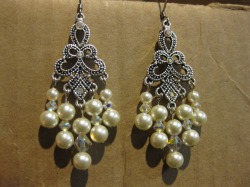
Chandelier Earrings
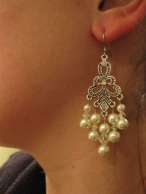
Chandelier Earrings on me
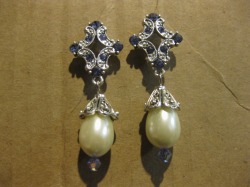
Tanzanite Earrings
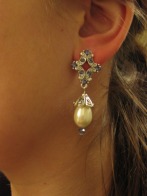
Tanzanite Earrings on me
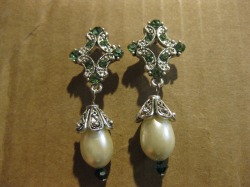
Erinite Earrings
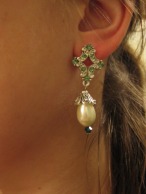
Erinite Earrings on me
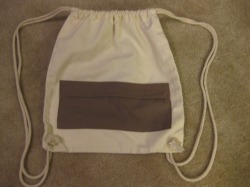
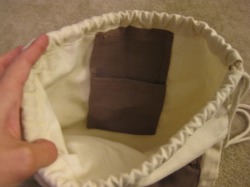
HM backpack
This is still a work in progress and is only partial DIY but I thought I would show you ladies what I have so far! I wanted a backpack we could carry around on our Disney honeymoon (to carry water, tickets, camera, etc). I bought the bag from Joann and have so far gotten my mom's help to sewn on a zipper pocket to the front and a little Velcro pouch on the inside to carry money/tickets/hotel key.
I think I want to add our monogram and wedding date to the front zipper pouch...but I may wait until it gets closer and I know exactly what I want.
I think I want to add our monogram and wedding date to the front zipper pouch...but I may wait until it gets closer and I know exactly what I want.
Bracelets!
I saw the haute inspired bracelets on so many of the DIY girls bios that I just fell in love with them and decided I wanted to make them for myself and my bridesmaids. I will wear the silver one and the BMs will all have the good/bronze one. I have to say this might be my fav DIY project so far!
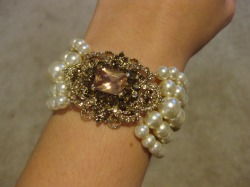
BMs bracelet
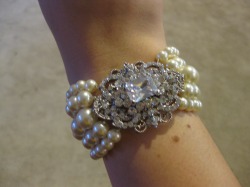
Bride bracelet
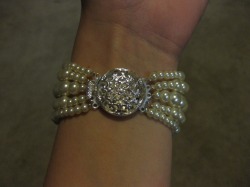
5 strand clasp
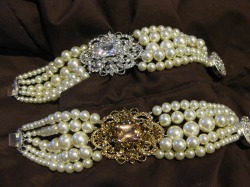
Both styles together
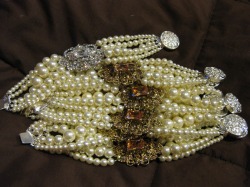
They are all done!
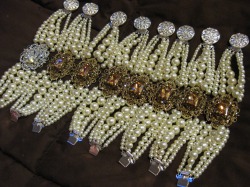
Here is how all 8 turned out
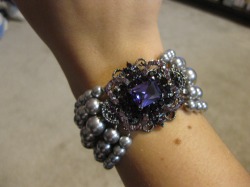
My family loved them so much that they had me make one for my Aunt for Xmas - I did hers with a purple brooch and gray pearls
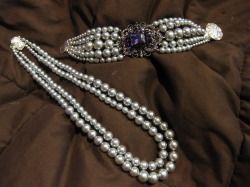
I also made my aunt a matching necklace
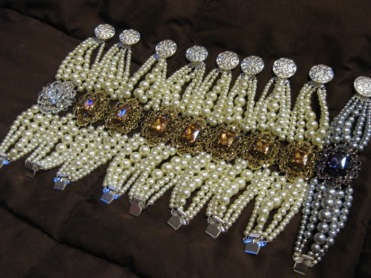
K so I may have went a bit overboard :) but here they are all done! I am supper proud of all 9!
Boxes for Bracelets
I made these using a die cut. I love how they turned out, I am just not sure how to display the bracelt in them. I like the look of them wrapped around something but I do not want to use paper towel...hummm.
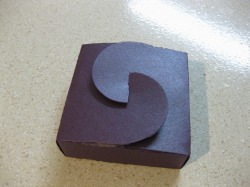
This is the box all closed up
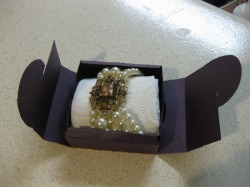
Here is the bracelet wraped around a paper towel
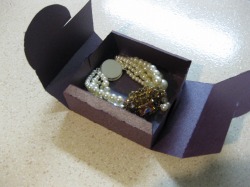
Here is the bracelet in the box by itself
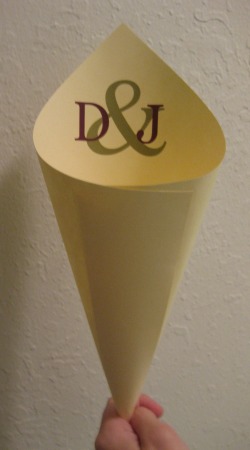
Popcorn Cones
For our late night snack - POPCORN :) - we decided to make cones for guest to eat the popcorn out of...that way it would fit our wedding style more that the red/white popcorn bags.
We need to make about 400 of these for our 200 guests incase they go up for seconds and dont have their original cone
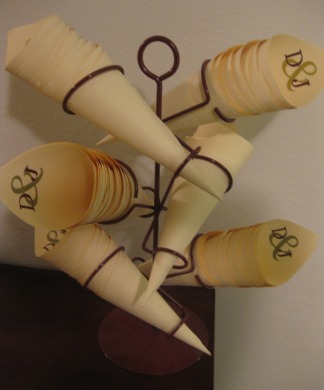
We had a Wine Holder lying around that we spray painted and are using as a cone holder
I had a knottie ask me how I made these so I figured I would include what I told her here as well!
All I did was place a monogram in the upper left corner of a word doc and press print x 400 (yeah we made a ton). I did angle the monogram in the corner so that when the corner faced up the monogram was right-side-up.
Then all I did was cut the 8 1/2 x 11 paper into an 8 1/2 x 8 1/2 square. I have a paper cutter so this process went pretty fast. I would DEF recommend a paper cutter for this!
After that we just curved the paper around into a cone. We used normal scotch tape to tape once around the bottom tip and then used double sided tape to tape once or twice across the "seam" so it wouldn't come apart.
Depending on how you curve the paper into a cone too they can come out all looking a little bit different in size but not drastically but just be aware of that if you want to try to get them all the same then prolly just have one person doing them.
HTH someone!
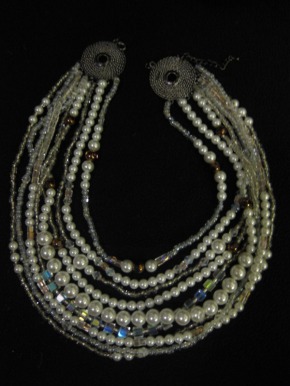
Original jewelry
Before I choose my dress, I made these two pieces. I love them, but unfortunately they do not go with my dress. If someone is interested in buying them I would consider selling them.
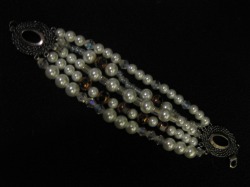
The matching bracelet
This was my inspiration. Found at http://www.stylemepretty.com/2009/06/11/diy-project-pearl-necklace
Bride Zip-up
After talking to all the ladies on the Oct 2010 board I just had to make one of these.
I bought individual iron on crystals at Joann (or Michaels) because I wanted "Bride" to be in purple, printed our the letters in a font I wanted and pushed a pencil through the paper onto the zip-up - maybe not the best way to do it but it left a trace of dots that was really easy to follow. The I DO came as a whole iron on so that part was simple. I may add my new initals or last name to the pocket in the front or maybe shoulder or very bottom of the back. Overall I am really happy with how it turned out.
I bought individual iron on crystals at Joann (or Michaels) because I wanted "Bride" to be in purple, printed our the letters in a font I wanted and pushed a pencil through the paper onto the zip-up - maybe not the best way to do it but it left a trace of dots that was really easy to follow. The I DO came as a whole iron on so that part was simple. I may add my new initals or last name to the pocket in the front or maybe shoulder or very bottom of the back. Overall I am really happy with how it turned out.
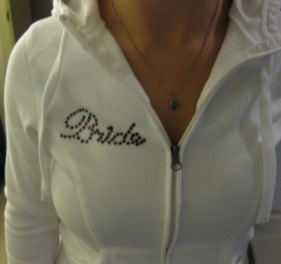
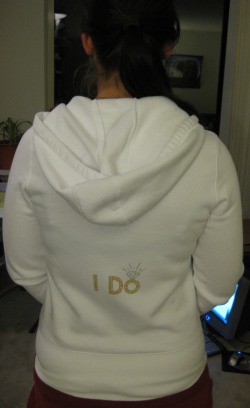
Photo Coasters
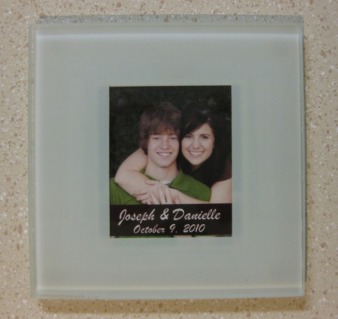
These are our favors!
I ordered them online and added the picture (business card from VistaPrint) to make it personal. We are still trying to decide if we should add something to them. Maybe ribbon? They will be tucked into the pocket fold napkins right in front of the menu card at each place setting.
I ordered them online and added the picture (business card from VistaPrint) to make it personal. We are still trying to decide if we should add something to them. Maybe ribbon? They will be tucked into the pocket fold napkins right in front of the menu card at each place setting.
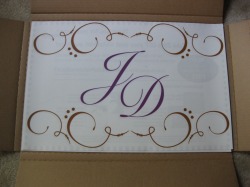
DIY Card Box
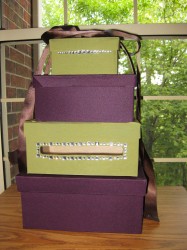
I saw a picture of a card box online that I loved and decided I could replicate it with my colors. Here is what I made...I think it turned out really well. The brown ribbon will be tied in a big bow at the top on wedding day.
Photo Guest Book
Instead of a traditional guest book, we decided to make a guest book out of our engagement pics - that way we will actually look at the guest book after the wedding. We used shutterfly to make it.
Chargers
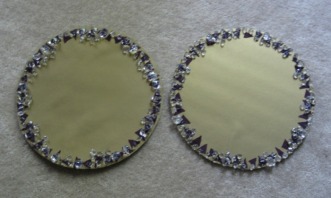
I made chargers for Joe and I to use at the head table. I would have loved to make them for everyone but two took enough time and money so I am good to stop there.
Window Stickers/Decals
I created two window decals on vistaprint that we will put on the two glass doors that lead from the hallway into the main room at the reception. There are about 12" x 19" each
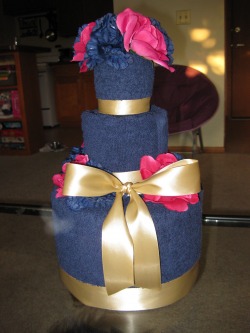
Towel Cake
So I made this for a friend's wedding but since it was WR I thought I would include it in here! Their colors were navy and gold so I chose Navy towels and gold ribbon. If I remember correctly - there are 2 big towels in each tier with the bottom tier being body towels, the middle tier being hand towels, and the top being washcloths. I just used long pins to hold it all together.
