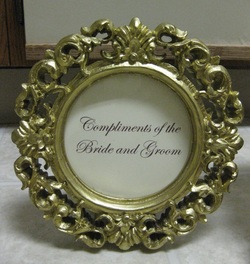
Signs
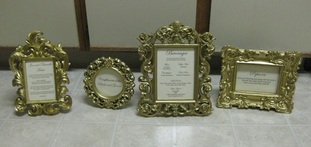
We made some signs to go around the reception and thanks to knottie dcprep who I bought the already spray painted frames from, this project was super easy.
We made a:
-Bar Sign
-Popcorn Sign (our late night snack)
-Joe and Danielle Trivia Sign (our game to get us to kiss)
-Bathroom Basket Sign
We made a:
-Bar Sign
-Popcorn Sign (our late night snack)
-Joe and Danielle Trivia Sign (our game to get us to kiss)
-Bathroom Basket Sign
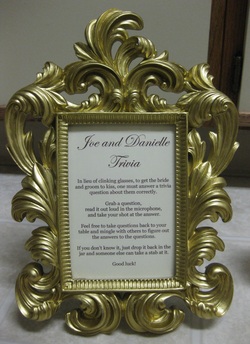
Trivia Sign
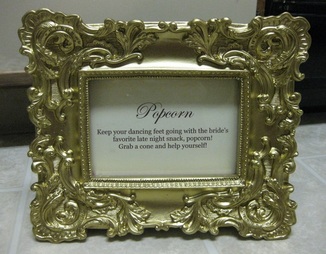
Late Night Snack Sign - Popcorn!
Bathroom Basket Sign
Bar Sign
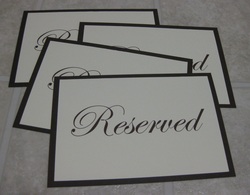
We also made some Reserved signs for the pews at the ceremony
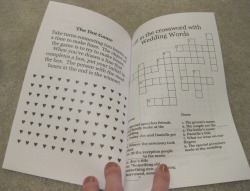
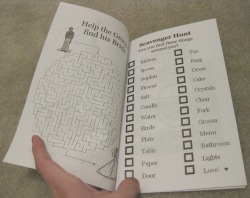
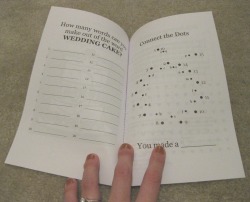
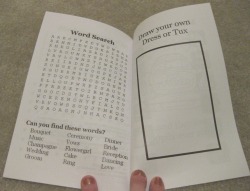
Programs - 100% DONE!
These programs were def a labor of love and in no way simple but I really really like how they turned out!
We are having a catholic ceremony and I have sat through enough of them to know that they can get a little long so I always love it when there is a program with things to read - it helps keep me engaged. So I knew I wanted a program with a lot of pages so if guests were looking for something to do they could read through it!
Here is the completed version!
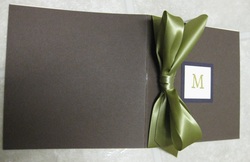
The ribbon actually does nothing to hold the pages together so we put one little staple through the middle that you can kind of see in this pic
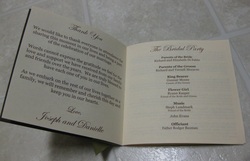
A thanks you and start of our bridal party list
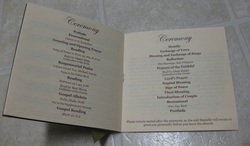
Ceremony Program - This is the only part that I really needed so we put it right in the middle so guests could get there quickly if that is the only thing they wanted to see
Each person in the bridal party got a fun fact about them and then on the right are things to do in the area around the ceremony and reception sites
See the ribbon does nothing really but look pretty :)
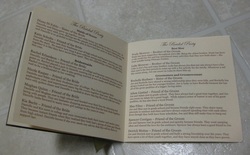
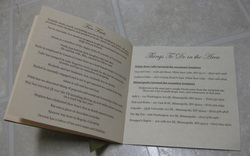
Who is standing up for me and for Joe and a little bit about how we know each person

Joe wrote up a story of how we meet and our lives together that we threw in here
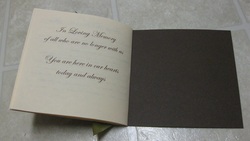
Our 'In Loving Memory' page
Table Names
Instead of table numbers, we decided to name each table after places we have traveled together. Each table triangle has the same panel on each of the three sides. The name of the location is at the top, then we put a picture of us on the panel and lastly a description of our trip or a fun story about that location.
Our cocktail hour is an hour and a half so we are hoping that going around and reading all the table names could be something guest could choose to do to kill some time.
Our cocktail hour is an hour and a half so we are hoping that going around and reading all the table names could be something guest could choose to do to kill some time.
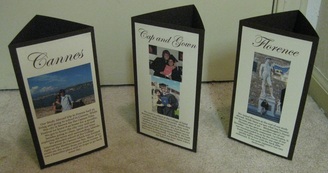
Here is a stack of the unassembled panels on top of our scored triangles
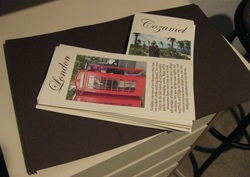
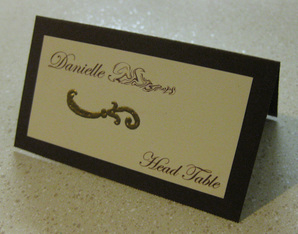
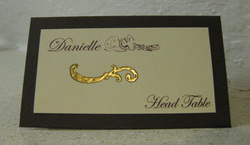
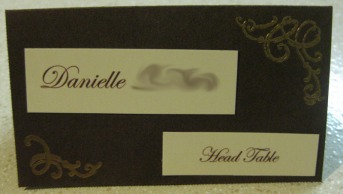
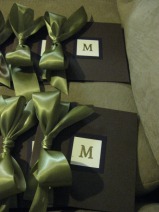
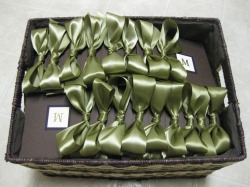
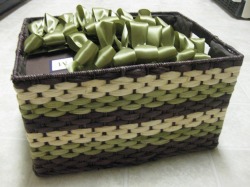
Final Escort Card Design
This is the second and fianl draft of our escort cards and we are going to stick with this one as we are two weeks out and need to make them :). Done!
They are just brown cardstock tents with ivory boxes for the brown text that I just printed off on my computer.
Then we embossed a little gold swirl on the front.
They are just brown cardstock tents with ivory boxes for the brown text that I just printed off on my computer.
Then we embossed a little gold swirl on the front.
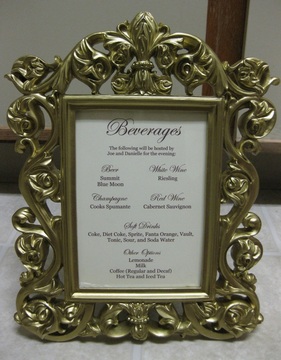
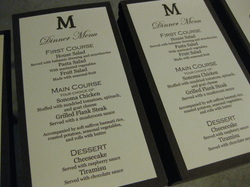
Menus
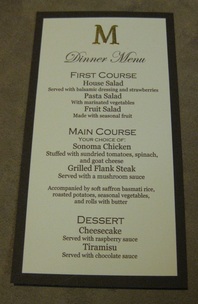
Do you really need menus? ---I see this question on the boards all the time and the answer is no, you dont. But I really wanted to them as I think it is fun to know what you are going to get. We are having a family style meal by course as well so knowing what has been put down at your table in big dishes I think would be helpful. We prolly spent more time making them then we should but Joe helped a lot with these so it went really fast.
We used brown cardstock for the backing and ivory cardstock for the text. We printed them with brown text and then embossed a "M" at the top in gold to match our programs and invite belly bands.
In total we made 171 of them.
We used brown cardstock for the backing and ivory cardstock for the text. We printed them with brown text and then embossed a "M" at the top in gold to match our programs and invite belly bands.
In total we made 171 of them.
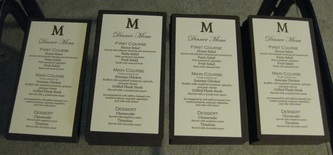
This is what 171 menus look all together
Hand Canceling
After seeing my non hand canceled test run come through I decided I wanted the invites to be hand canceled. See below for what it looked like without hand canceling, and here are pics with the hand canceling. I think it made a huge difference! And I had no problem at all getting the post office to do it for me and they did it for free. I did go to a post office inside a grocery store that was much less busy so maybe that made a difference.
So glad these are mailed!!!
So glad these are mailed!!!
You can see that there is no barcode at the bottom or huge stamp at the top - just the light red stamp over the postage at the top
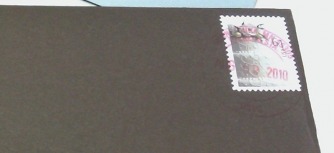
Close in pic of the only marking on the front
On little mark at the top but not bad at all!
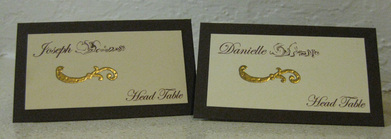
First Draft of Escort Cards
We are naming all our tables after places we have been so I knew I needed a good size area to put the table name on the escort card. This draft has the similar stamp and embossing that our invites have - only on a smaller scale.
I like them, but besides the text boxes being a little crooked I think something else is off too...but I am not sure what yet.
I like them, but besides the text boxes being a little crooked I think something else is off too...but I am not sure what yet.
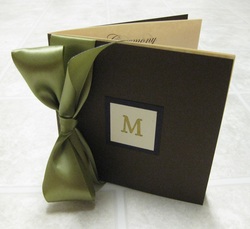
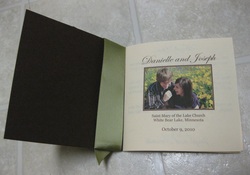
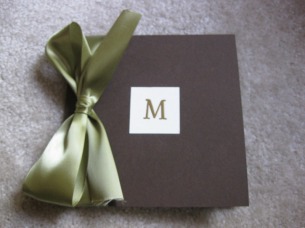
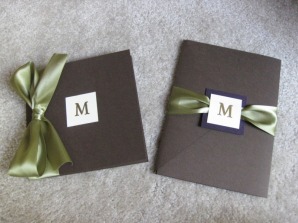
Finished Program - covers
I am still working on the insides for the program, but in the meantime I wanted to work on the program covers.
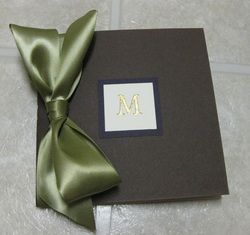
Each have an embossed M on the front backed by eggplant matting. The covers themselves are brown and a willow green ribbon is tied around the front cover. The M and ribbon is the same used in my Invite belly band.
I am inviting 200 guests, expecting around 150/160 and made 121 programs which I think will be enough and if we run out we run out.
In the basket ready to go!...too bad none of them have anything inside :)
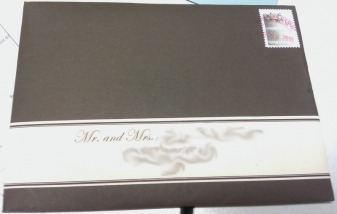
All the Invites are DONE!!! :)

The last one has been stamped and sealed and they are ready for the mail! I am so happy they are done!
I have to say this was my least fav DIY project although I love how they turned out - they were just so much work. I worked on them slowly over 8 months so to see them stacked and ready to go is fantastic!
I have to say this was my least fav DIY project although I love how they turned out - they were just so much work. I worked on them slowly over 8 months so to see them stacked and ready to go is fantastic!
Test Invite - Not Hand Stamped
I wanted to see how the invitation would come through the mail so I mailed it to myself. I wasnt sold on hand stamping so I figured I would just send it through normally - and I have to say it changed my mind about hand stamping...I am now going to try to hand stamp them.
For those of you like me who had no idea what hand stamping is - basically it allows you to hand cancel the invites using a stamp versus sending them through the machine to get stamped. The machine puts a stamp at the top and a barcode at the bottom. The hand stamp just has the stamp in the corner. Here is a website that I found with pics of both:
http://www.nycityweddings.com/chat/topic-303719-1.html
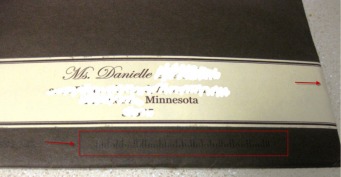
So here are pics of what they look like after they came through the mail....I have to say I am not thrilled on how they came out. Yes it is only the envelope and I have heard that there are still other machines they could go through even if I hand stamp but I have spent so much time on these that if I can save it from even one machine I think it would be worth the time to hand stamp.
(To see how it looked before I mailed it, see the entry below "DIY Wrap Around Label...")
So are they that bad - no. Am I going to try to hand stamp them anyway - yes. :)
For those of you like me who had no idea what hand stamping is - basically it allows you to hand cancel the invites using a stamp versus sending them through the machine to get stamped. The machine puts a stamp at the top and a barcode at the bottom. The hand stamp just has the stamp in the corner. Here is a website that I found with pics of both:
http://www.nycityweddings.com/chat/topic-303719-1.html
So here are pics of what they look like after they came through the mail....I have to say I am not thrilled on how they came out. Yes it is only the envelope and I have heard that there are still other machines they could go through even if I hand stamp but I have spent so much time on these that if I can save it from even one machine I think it would be worth the time to hand stamp.
(To see how it looked before I mailed it, see the entry below "DIY Wrap Around Label...")
So are they that bad - no. Am I going to try to hand stamp them anyway - yes. :)
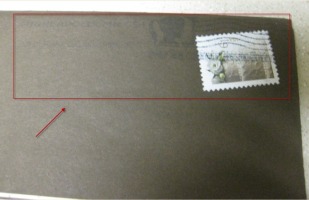
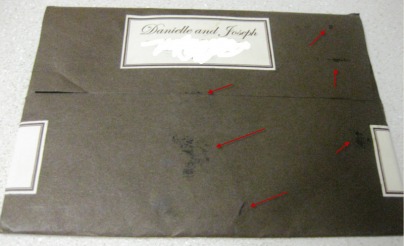
I may have gone overboard with the red arrows :)
DIY Wrap Around Labels and Return Address Labels
My handwriting is not good and honestly, I just didnt want to write out all the addresses....a faux pas I know, but I really dont care :). But I did want them to look nice so I figured I could go with wrap around labels.
I printed off the labels on normal weight ivory paper, cut them all out, and ran them through my 1.5 inch Xyron sticker making machine. It worked really well. I even mailed one to myself to see how it stuck and had no problem - they are not going anywhere! I was surprised too on how inexpensive the machine was with a 40% off coupon at Michaels and it makes the process fast and easy. I also made a return address label to match.
I printed off the labels on normal weight ivory paper, cut them all out, and ran them through my 1.5 inch Xyron sticker making machine. It worked really well. I even mailed one to myself to see how it stuck and had no problem - they are not going anywhere! I was surprised too on how inexpensive the machine was with a 40% off coupon at Michaels and it makes the process fast and easy. I also made a return address label to match.

I need to center the wrap around label better - but you get the idea
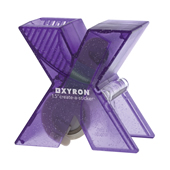
Here is the sticker making machine I used.
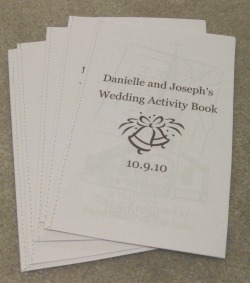
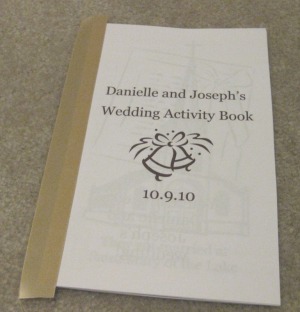
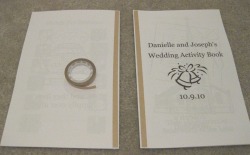
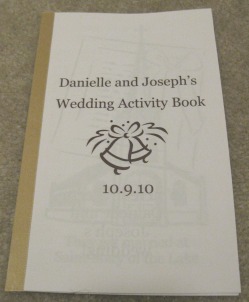
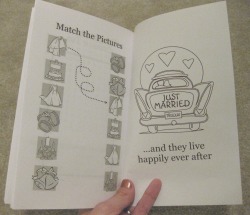
Kid's Activity Books
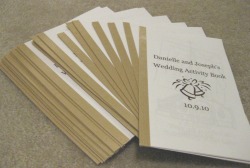
I wanted activity books for the kids to have something to do (and to go with the DIY crayons :)) so I made these!
We sewed down the edge and then wrapped a ribbon around the stitching to make it look more like a book with binding. Now my friends even want them at their tables :). Here are pics!
We sewed down the edge and then wrapped a ribbon around the stitching to make it look more like a book with binding. Now my friends even want them at their tables :). Here are pics!
STEP 1: After I printed them - we stitched across the edge
STEP 3: Put the ribbon on one side and then folded if over to the other side
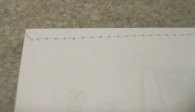
Close up if the stitching
STEP 2: Put tape accross the edge on each side
STEP 4: Done!
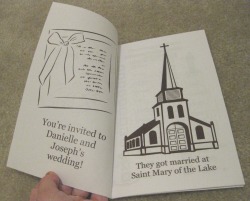
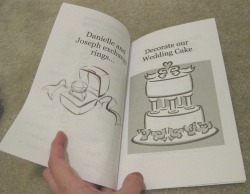
Here is the content for the book. We tried to have parts for all ages of kids - from coloring pages for the younger kids to puzzles for the older kids. Here is how it turned out!
Program Mock Up
Again I got my inspiration from thecheshirekat's married bio.
They are going to be square 5.5x5.5 inch programs. I havent gotten the insides put together yet but her is the cover.
I am thinking that it needs the eggplant matting like our belly bands...
They are going to be square 5.5x5.5 inch programs. I havent gotten the insides put together yet but her is the cover.
I am thinking that it needs the eggplant matting like our belly bands...
Invite - Belly Band Mock up
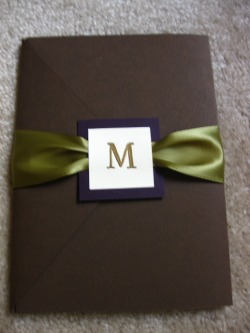
I got my inspiration from thecheshirekat's married bio - her stuff was so beautiful and I thought it fit my style beautifully.
We embossed the "M" on ivory card stock, ran it through my Xyron machine and then followed thecheshirekat's instructions on putting it all together. The matting is the same eggplant cardstock we used inside our invites and we got the Old Willow green ribbon from ebay seller organzabag. I LOVE how they turned out!
We embossed the "M" on ivory card stock, ran it through my Xyron machine and then followed thecheshirekat's instructions on putting it all together. The matting is the same eggplant cardstock we used inside our invites and we got the Old Willow green ribbon from ebay seller organzabag. I LOVE how they turned out!
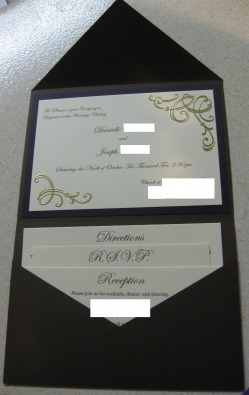
Invite - Inside Mock-Up
I decided to go DIY with my invites not only to save $ but because I couldnt find what I wanted.
The pocketfolds are brown and made using the die cut at the local paper store (you buy their paper and can use their tools) and a lot of folding and taping.
The panel part of the invite has an eggplant matting that is difficult to see in the picture. The words themselves are brown and printed on ivory cardstock. We are then embossing the swirls in the corners.
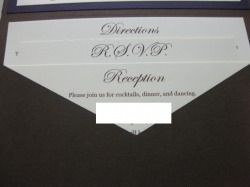
There are three inserts: Reception, RSVP, and Directions/Accommodations.
They are also printed with brown text on the ivory cardstock.
FONTS: Edwardian and Georgia
See section below for embossing tool info.
They are a TON of work but I think they are turning out great.
The pocketfolds are brown and made using the die cut at the local paper store (you buy their paper and can use their tools) and a lot of folding and taping.
The panel part of the invite has an eggplant matting that is difficult to see in the picture. The words themselves are brown and printed on ivory cardstock. We are then embossing the swirls in the corners.
There are three inserts: Reception, RSVP, and Directions/Accommodations.
They are also printed with brown text on the ivory cardstock.
FONTS: Edwardian and Georgia
See section below for embossing tool info.
They are a TON of work but I think they are turning out great.

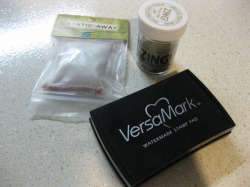
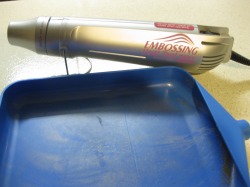
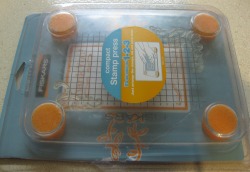
Embossing Tools
I embossed the two gold swirls on our invites using the following tools:
Static Away from Archiver's - used to prep the paper... then the powder then only stuck where stamped
Versam Mark Watermark Stamp pad
Zing gold embossing powder
Embossing Heat Gun
Tray for powder (not really necessary but came in handy)
Stamp Press - so that I could put both clear stamps on and stamp at the same time
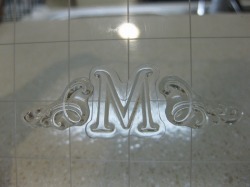
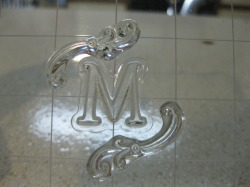
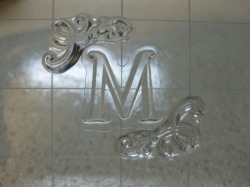
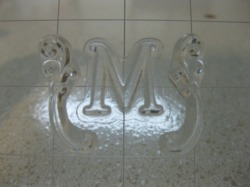
Monogram stamp?
Joe and I wanted some sort of monogram stamp with our new last initial for invites, programs, etc.
I already bought the stamps we are going to use for the invites so I figured we could just incorporate a "M" in there two and "make" our own stamp.
Here are the combinations we like so far...we may need to actually stamp them to be sure.
I already bought the stamps we are going to use for the invites so I figured we could just incorporate a "M" in there two and "make" our own stamp.
Here are the combinations we like so far...we may need to actually stamp them to be sure.

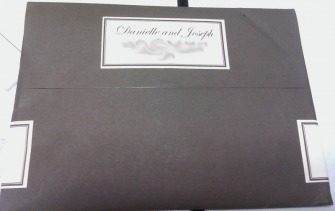
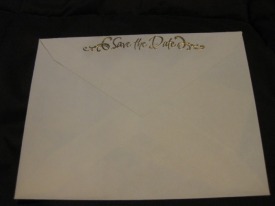
Embossed STD envelopes
I tried embossing for the first time and a, completely addicted to it! In total, we are planning on embossing the back of your STD envelopes, part on the invites, and likely something on the program cover and menus.
Here are our STD envelope embossing which we have done!
Here are our STD envelope embossing which we have done!
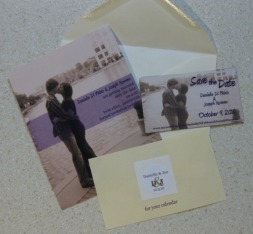
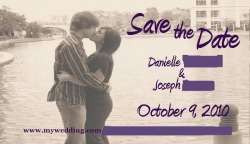
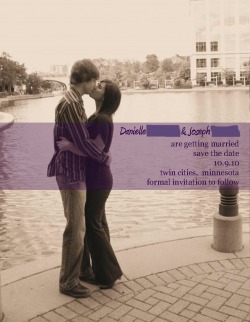
Save The Dates
We ended up with a two sided postcard sized STD that we ordered from Vista Print. We are also including a STD magnet in the envelope and a calendar sticker. It may be a lot of pieces to put in the envelope but I wanted all of them so we are putting all of them in there :). Inspiration for these came from knottie almay86.
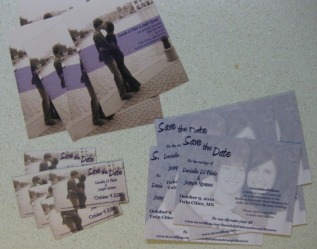
They are in!!!!
Here are all the pieces the guest will get (postcard is double sided)
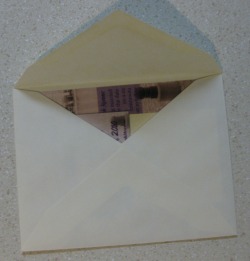
They all fit in the envelope surprising well
Magnet
Postcard Front
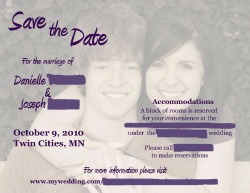
Postcard Back
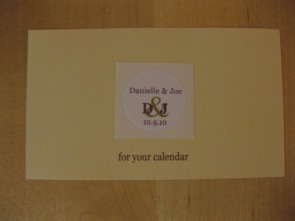
Calendar Sticker
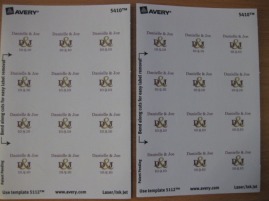
Printed the calendar stickers on Avery lables 5410 from Office Max
Sign for Guest Book
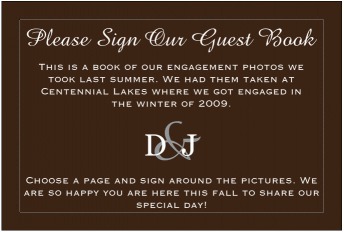
I love vistaprint - It is my new best friend. I made this sign on there (it is a lawn sign but we are using it at our guest table). Since we have a nontraditional guest book of our e-photos, we wanted to have a sign telling people to sign it. It will end up being 18" x 12"
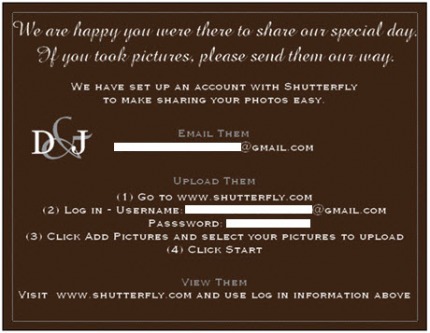
Photo Sharing Cards
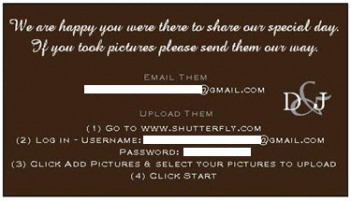
Also done on vistaprint - We want to give away cards at the reception and with the Thank Yous asking guest to send us the pictures they took. We have both a business card size and a postcard size - not sure which we will use - maybe both.
They say "We are happy you were there to share our special day. If you took pictures please send them our way."
They say "We are happy you were there to share our special day. If you took pictures please send them our way."
Car Magnet
So this is not really paper - but it seemed to fit in here.
We may or may not use this on our get away car :)
We may or may not use this on our get away car :)
